In this article
Create memberships for your organization, collect member information, and manage access, payments, and member data.
Introduction
Memberships in Orbi allow you to manage your community, collect information, and offer access to events or benefits. You can customize how members join, what information you collect, and how long memberships are valid.
Follow the steps below to create and manage your membership.
Step 1: Set up general information
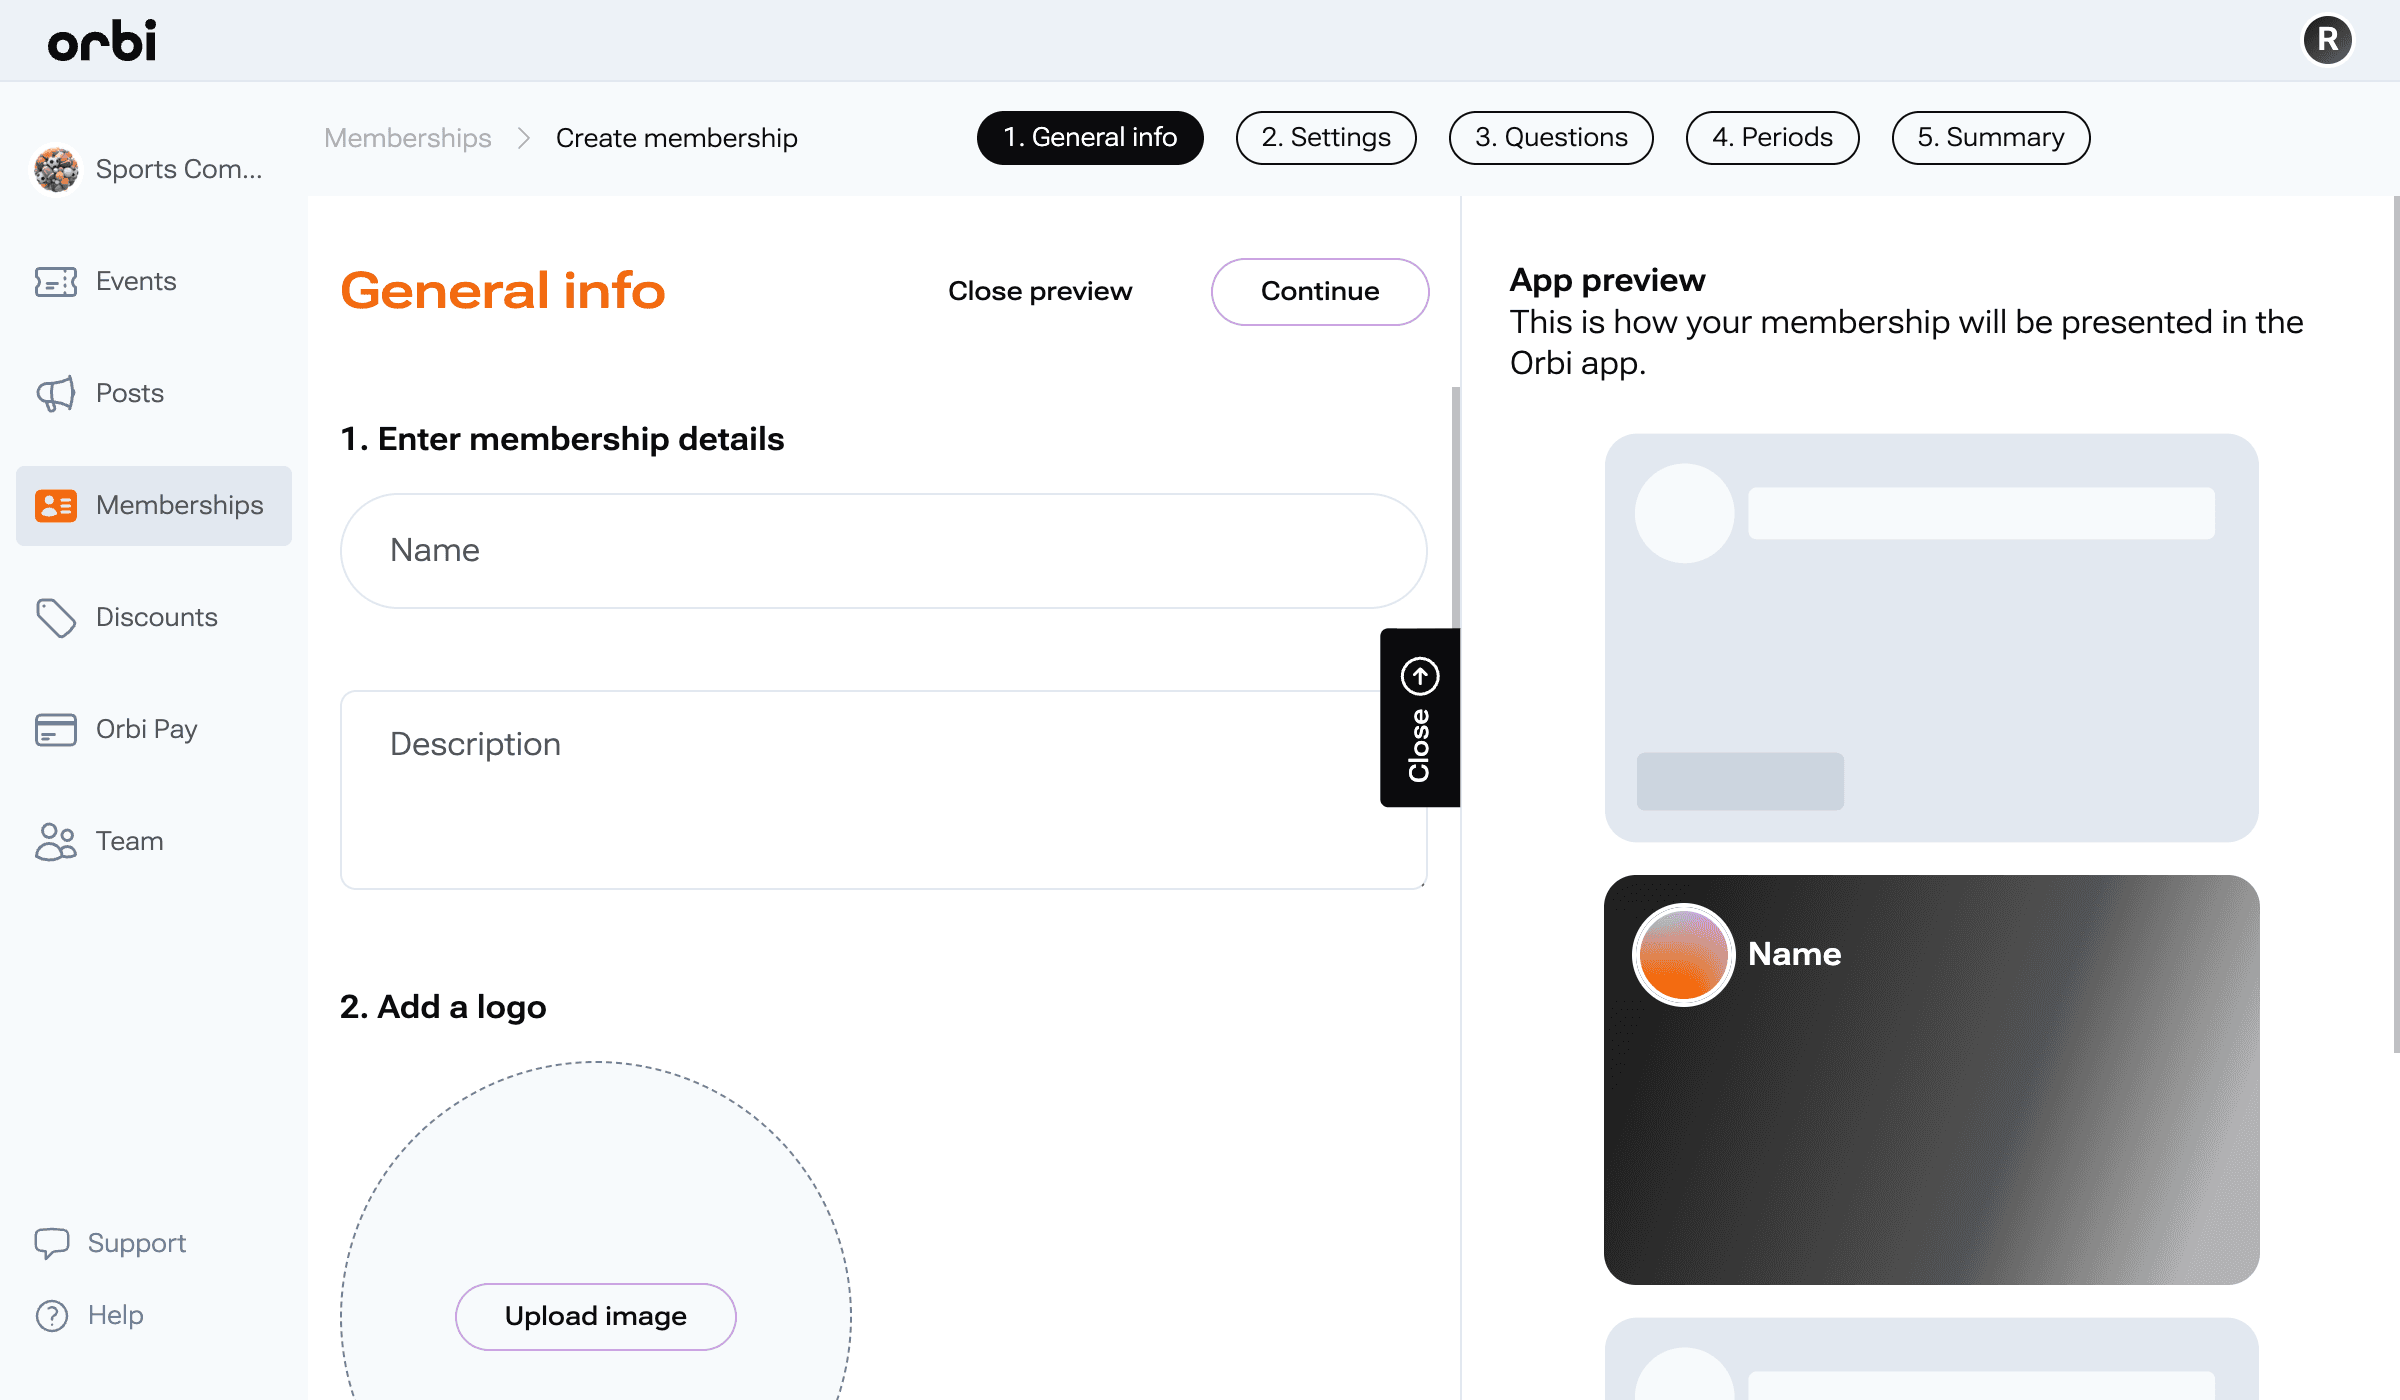
Start by adding the basic details for your membership. This is what users will see when they explore and join.
Enter membership details
Name: Give your membership a clear and recognizable name
Description: Briefly explain what the membership includes and why students should join
Add images
Logo: Upload an image to represent your membership
Background image: Add a cover image to make your membership more visually appealing
Add contact details
Provide a point of contact for members:
Name or organization
Email address
Phone number (optional)
Once completed, click Continue to move to the next step.
Step 2: Choose your membership type
By selecting the membership type that best fits your organization.
Important: You cannot change the membership type after publishing.
Available options:
Standard
Includes:
Collect member information through questions
Accept payments
Invite members
Require other memberships
Needs Approval
Includes:
All Standard features
Ability to review and approve applications before members join

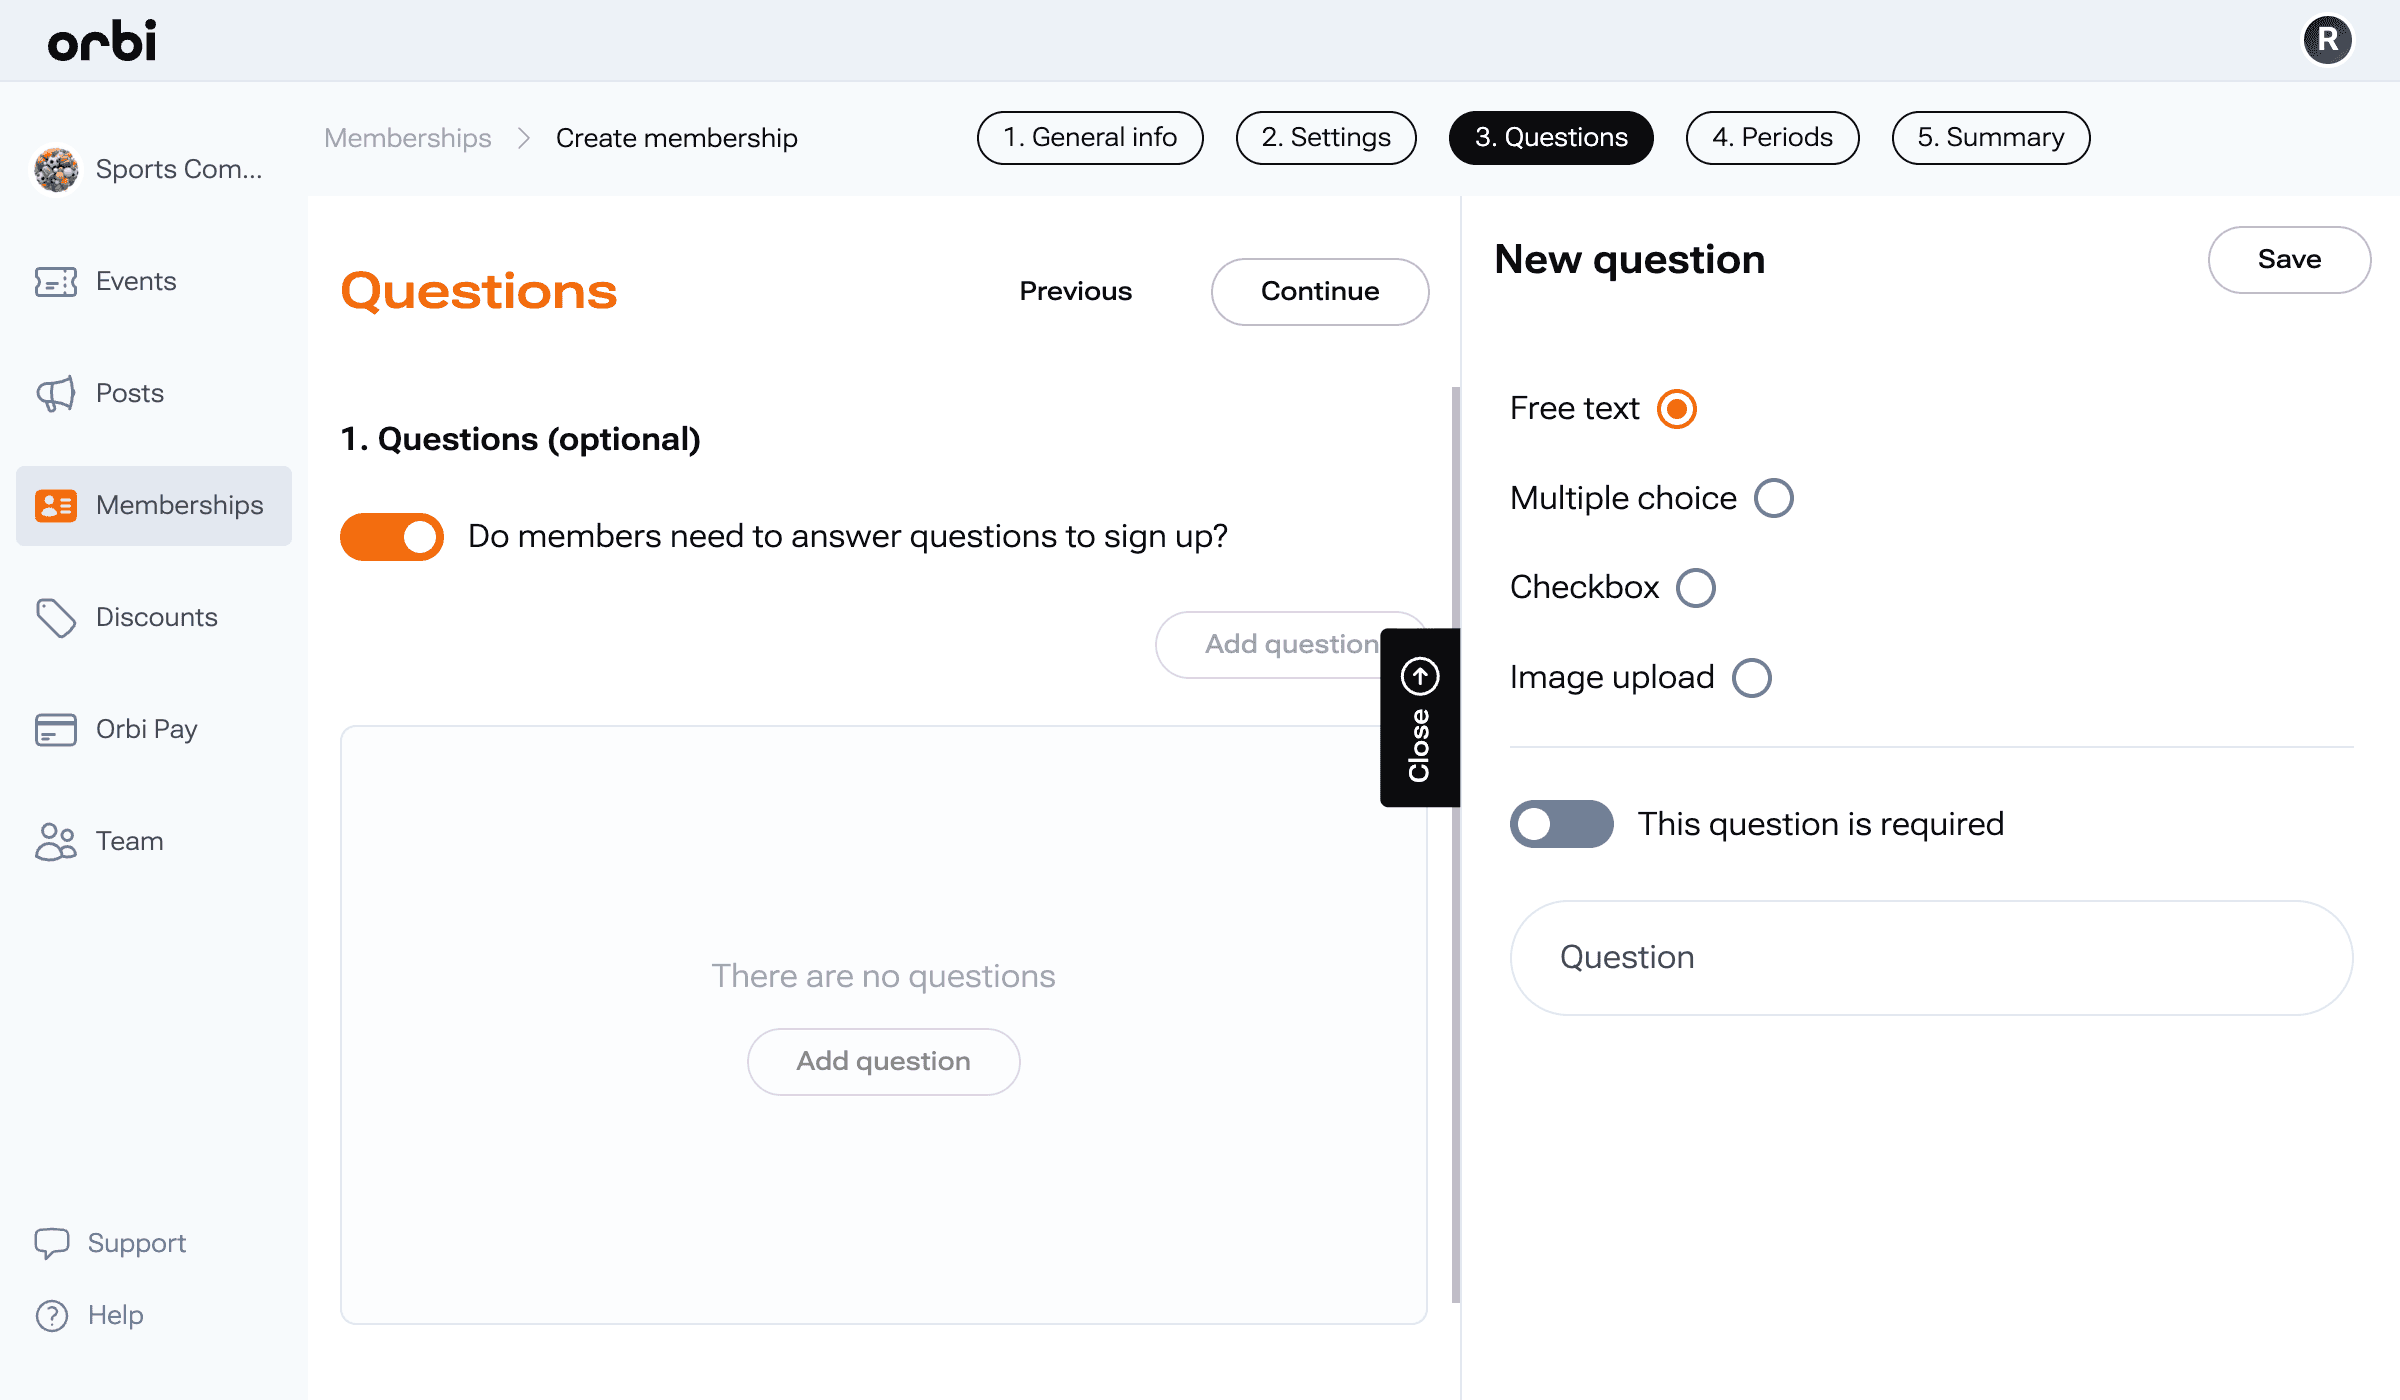
Step 3: Add member questions (optional)
You can collect additional information from members during sign up.
By default, you will receive:
First name
Last name
Email address
To add questions:
Enable “Do members need to answer questions to sign up?”
Click Add question
Choose your question type and add your content
Note: Questions will appear in the same order you create them.
All responses can be exported to CSV or Excel later.
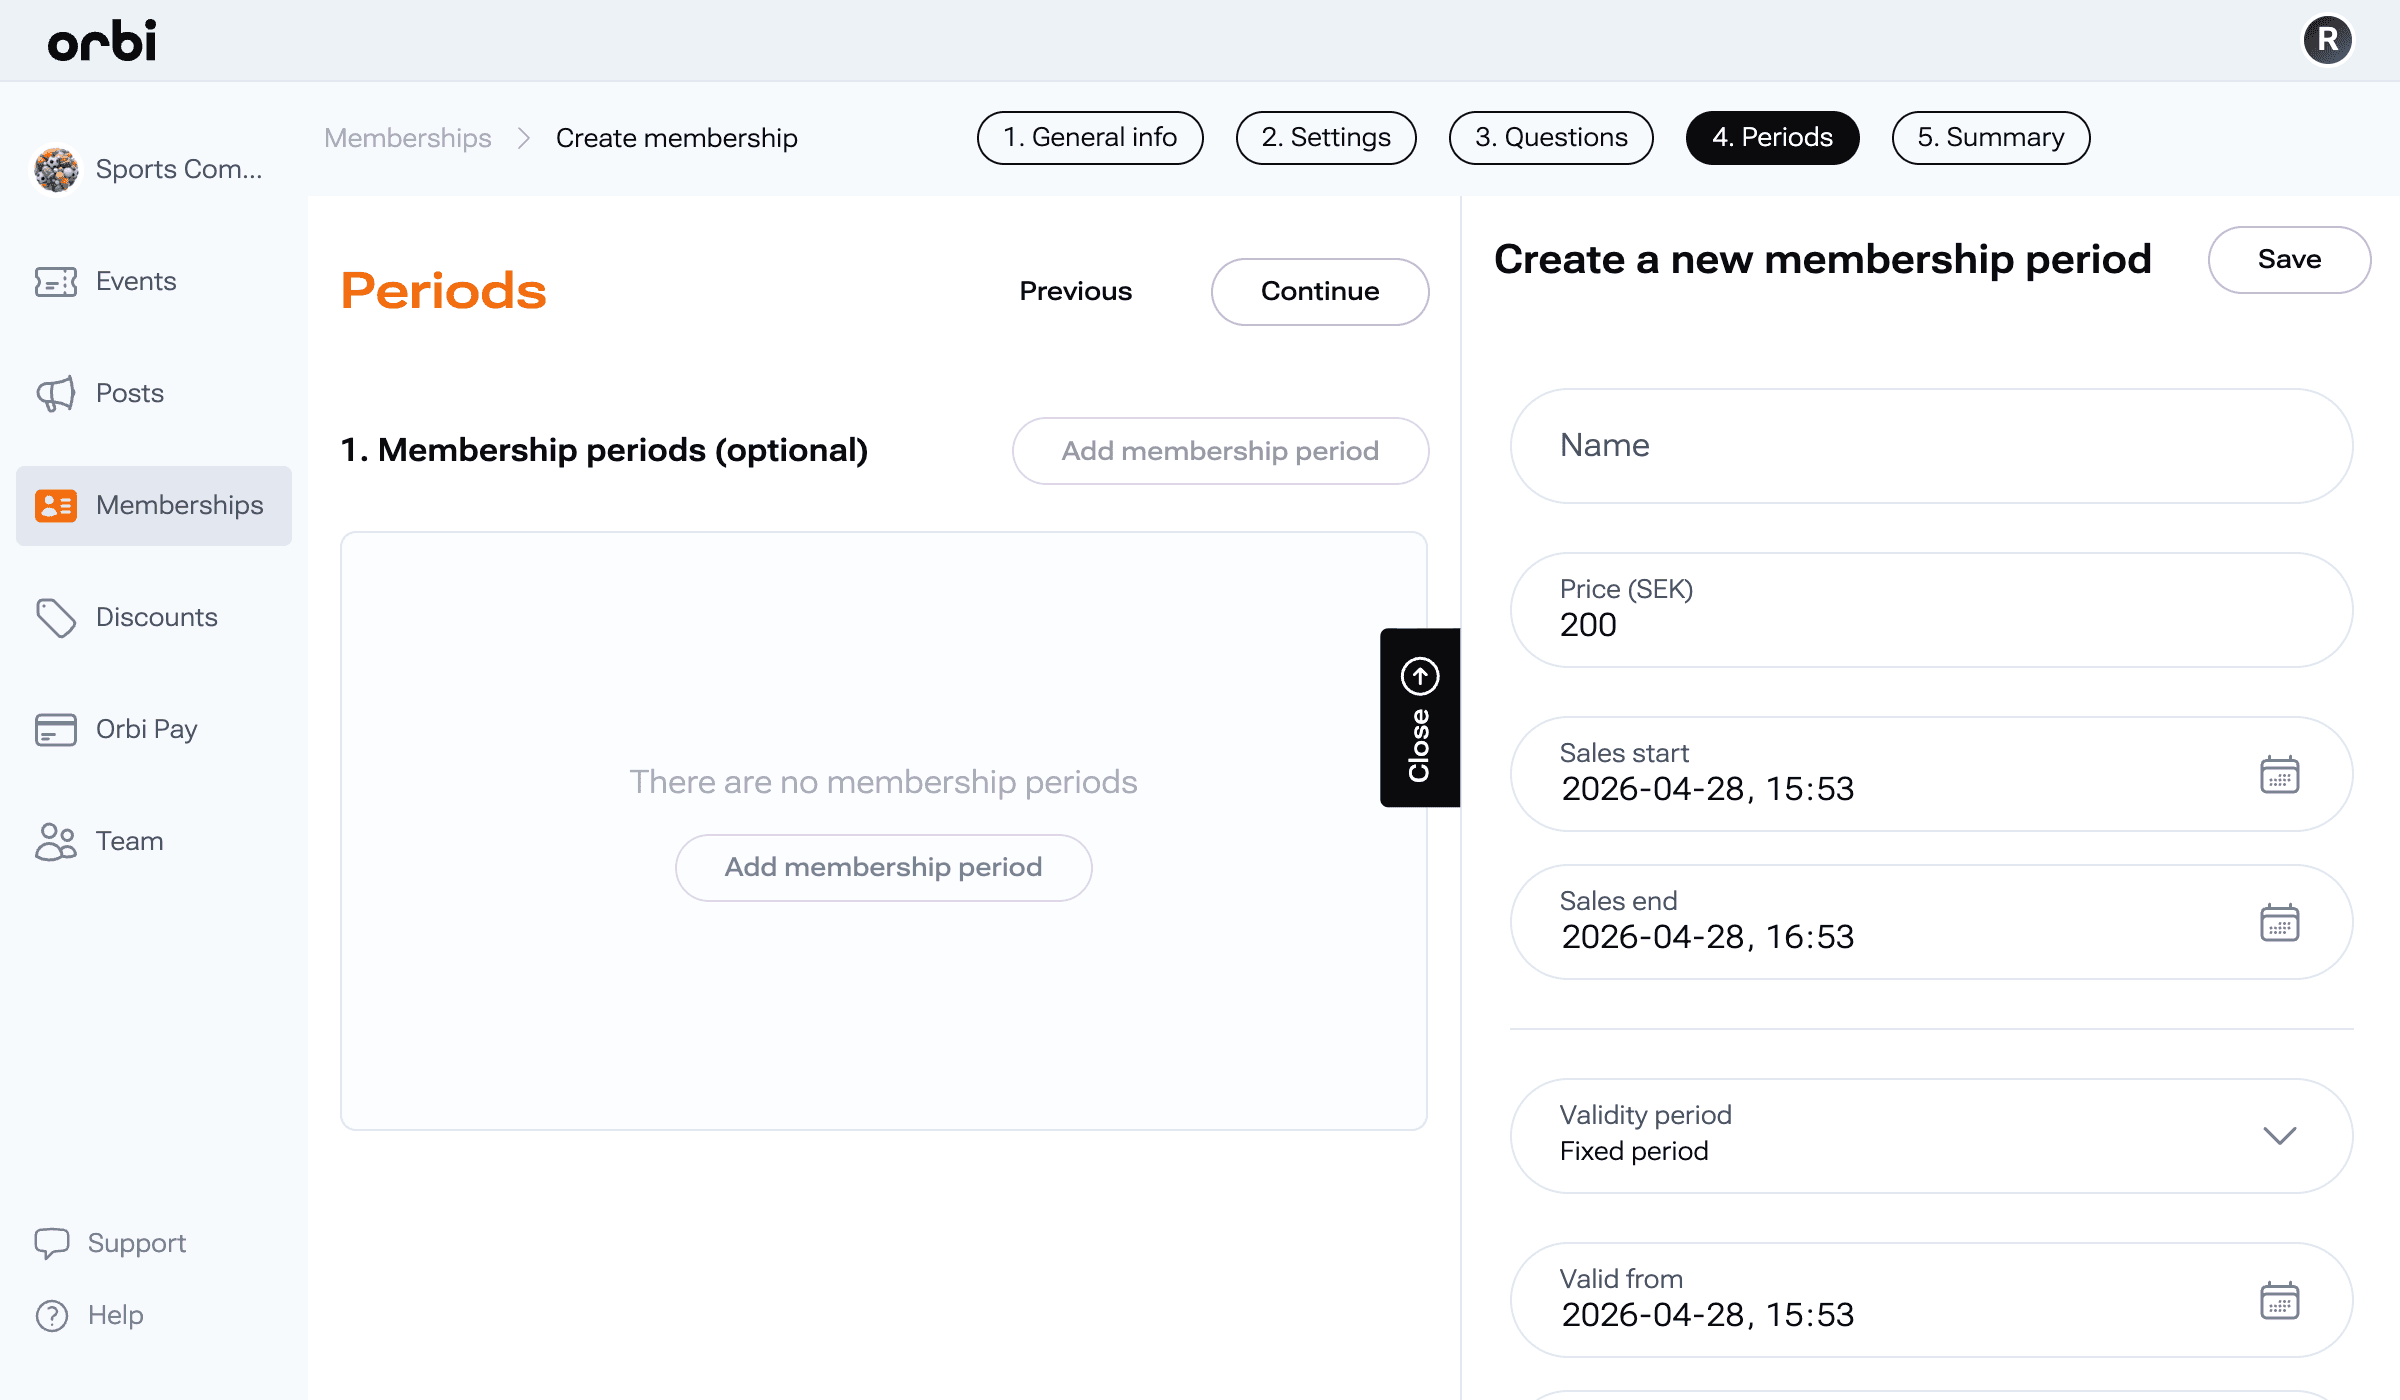
Step 4: Set up membership periods
Membership periods define how long a membership is valid and when it can be purchased.
To create a membership period:
Click Add membership period
Fill in the following:
Name: Example “1 Year” or “Spring Semester”
Price: Set a price (enter 0 if free)
Sales start and end: When the membership can be purchased
Choose validity type:
Fixed period: Set specific start and end dates
Dynamic period: Valid for a set duration from purchase (days, months, years, or lifetime)
To edit a period:
Click on an existing period to update its details.
Step 5: Review your membership
Before publishing, review all details on the summary page:
Membership name and description
Membership type
Questions
Membership periods and pricing
If needed, go back and make adjustments.
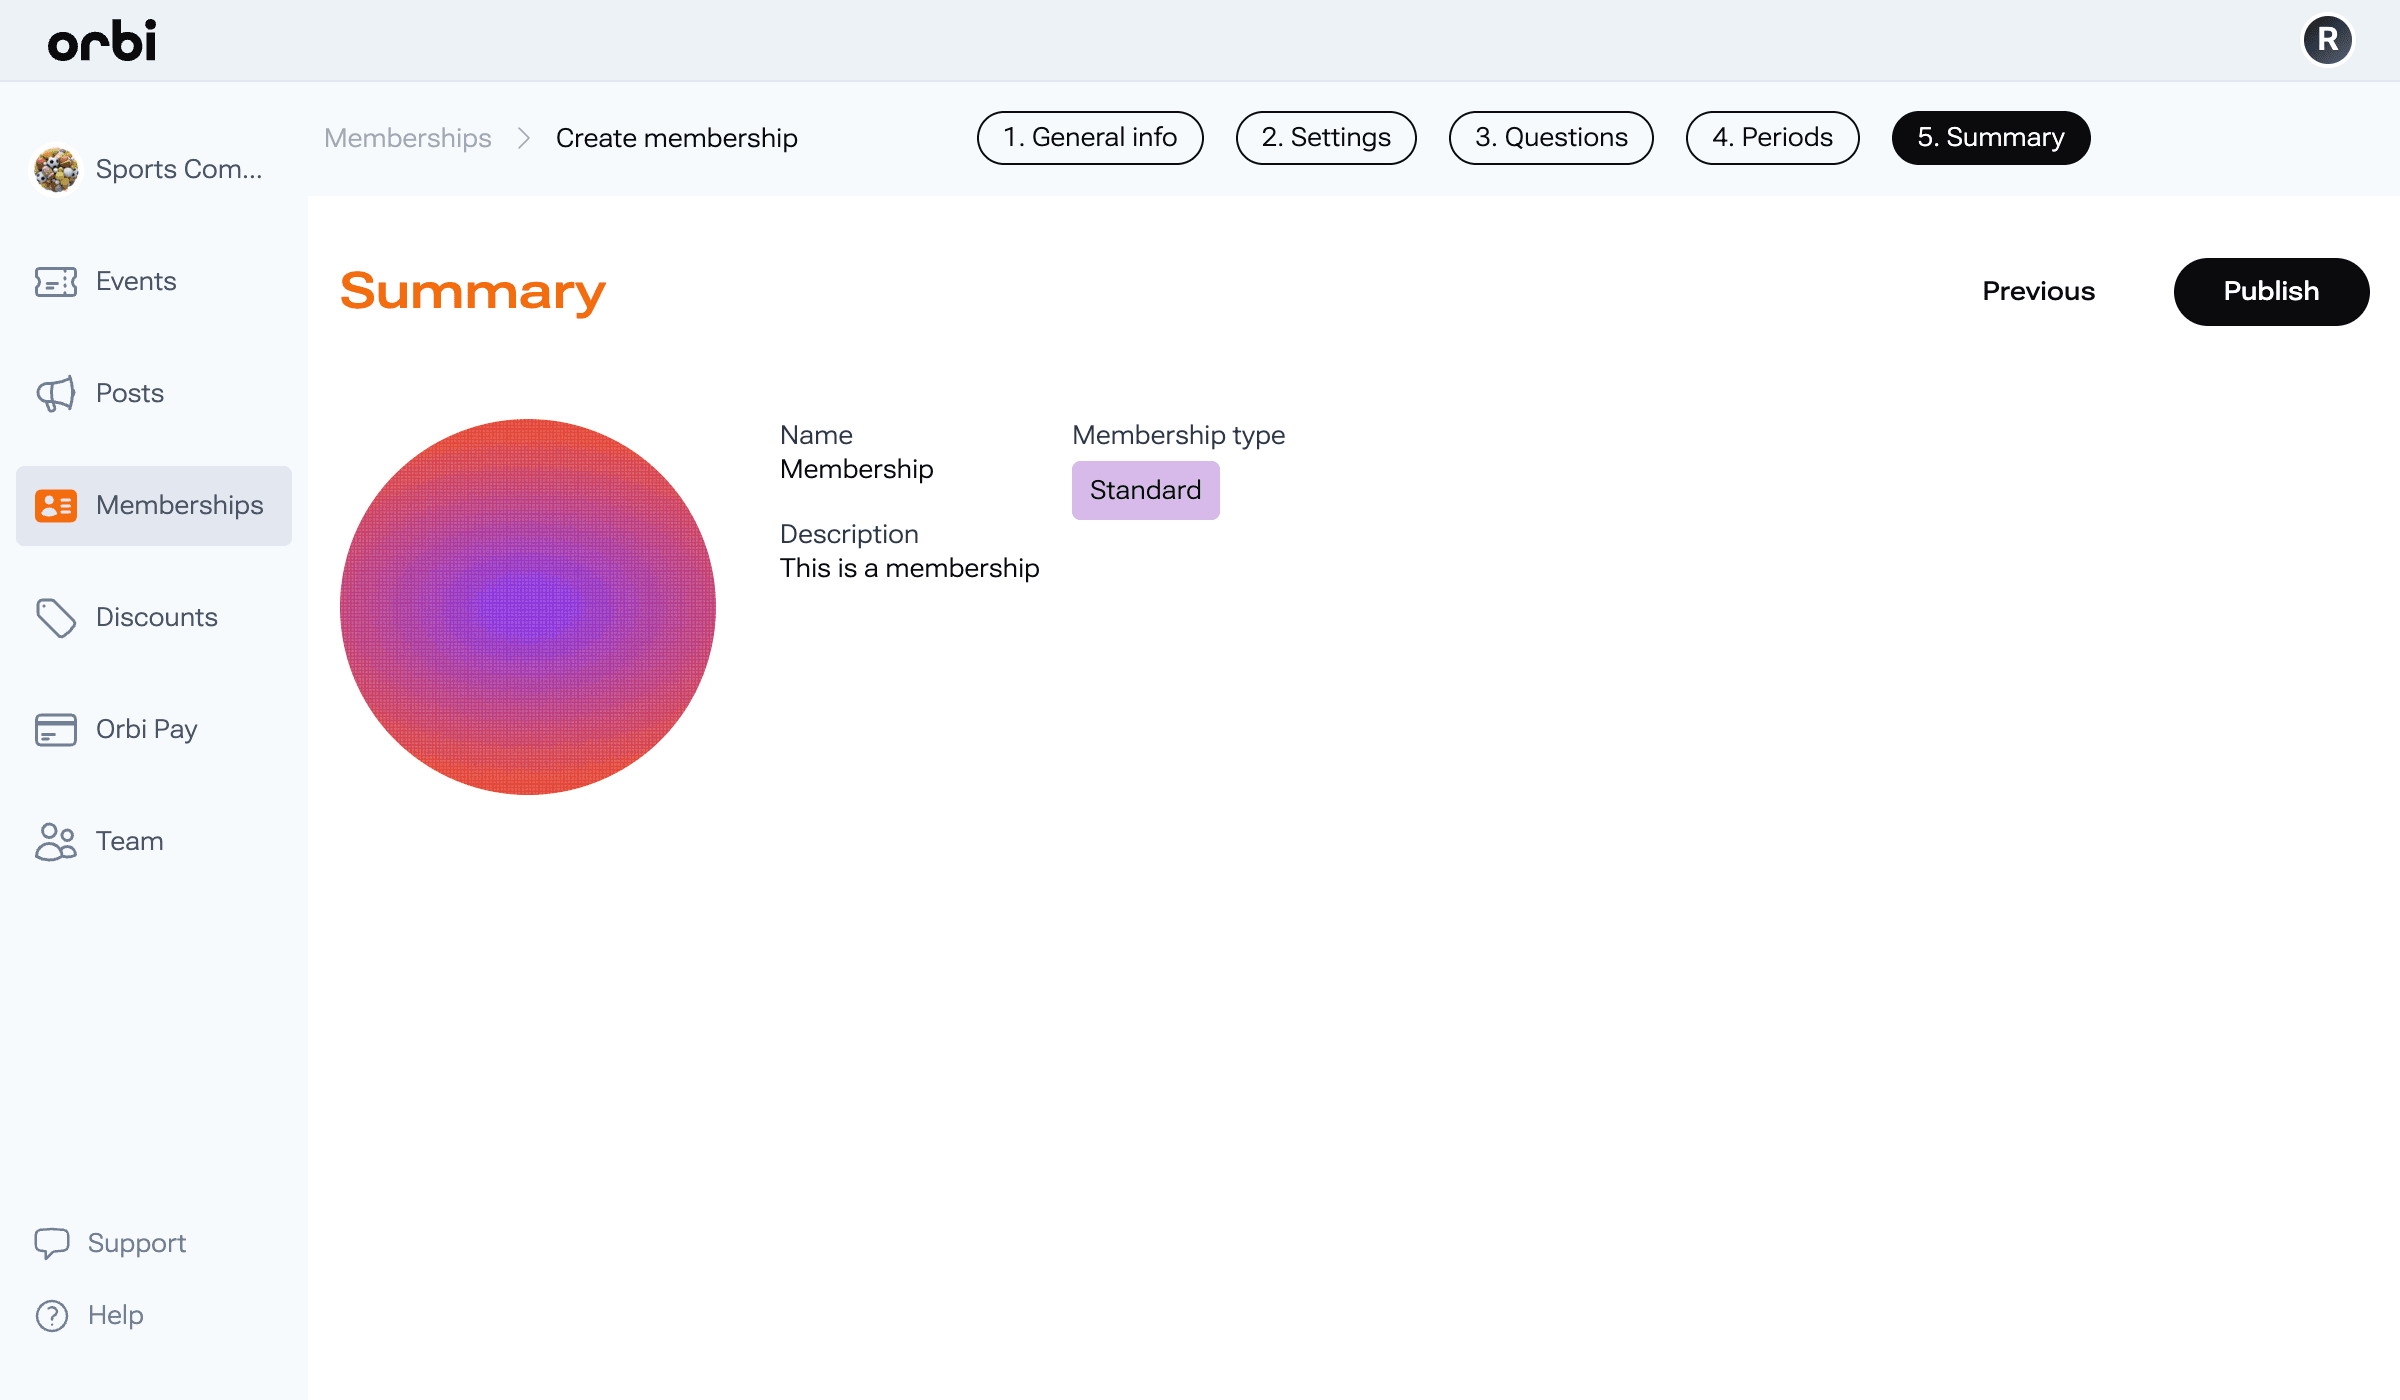
Step 5: Publish your membership
When everything looks correct, publish your membership to make it available to users.
Manage your membership
Once your membership is live, you can manage it from your dashboard.
Edit membership
Update details such as name, description, or images using the edit option.
View members
See a full list of members
View answers to questions
Export data to CSV or Excel
Track active and new members
Remove or refund members if needed
Manage questions
Go to the Questions tab to add or edit questions for new members.
Manage membership periods
Under the Periods tab, you can:
Add new periods
Update pricing
Adjust validity and sales dates
Track memberships
View when members joined and monitor growth over time.
Invite members
Invite multiple members at once:
Click Invite
Upload a CSV or Excel file with email addresses
Invited members:
Do not require approval
Can join directly, even if approval is enabled
Delete membership
If the membership is no longer needed, you can delete it using the trash icon.
Was this resource helpful?
Up next
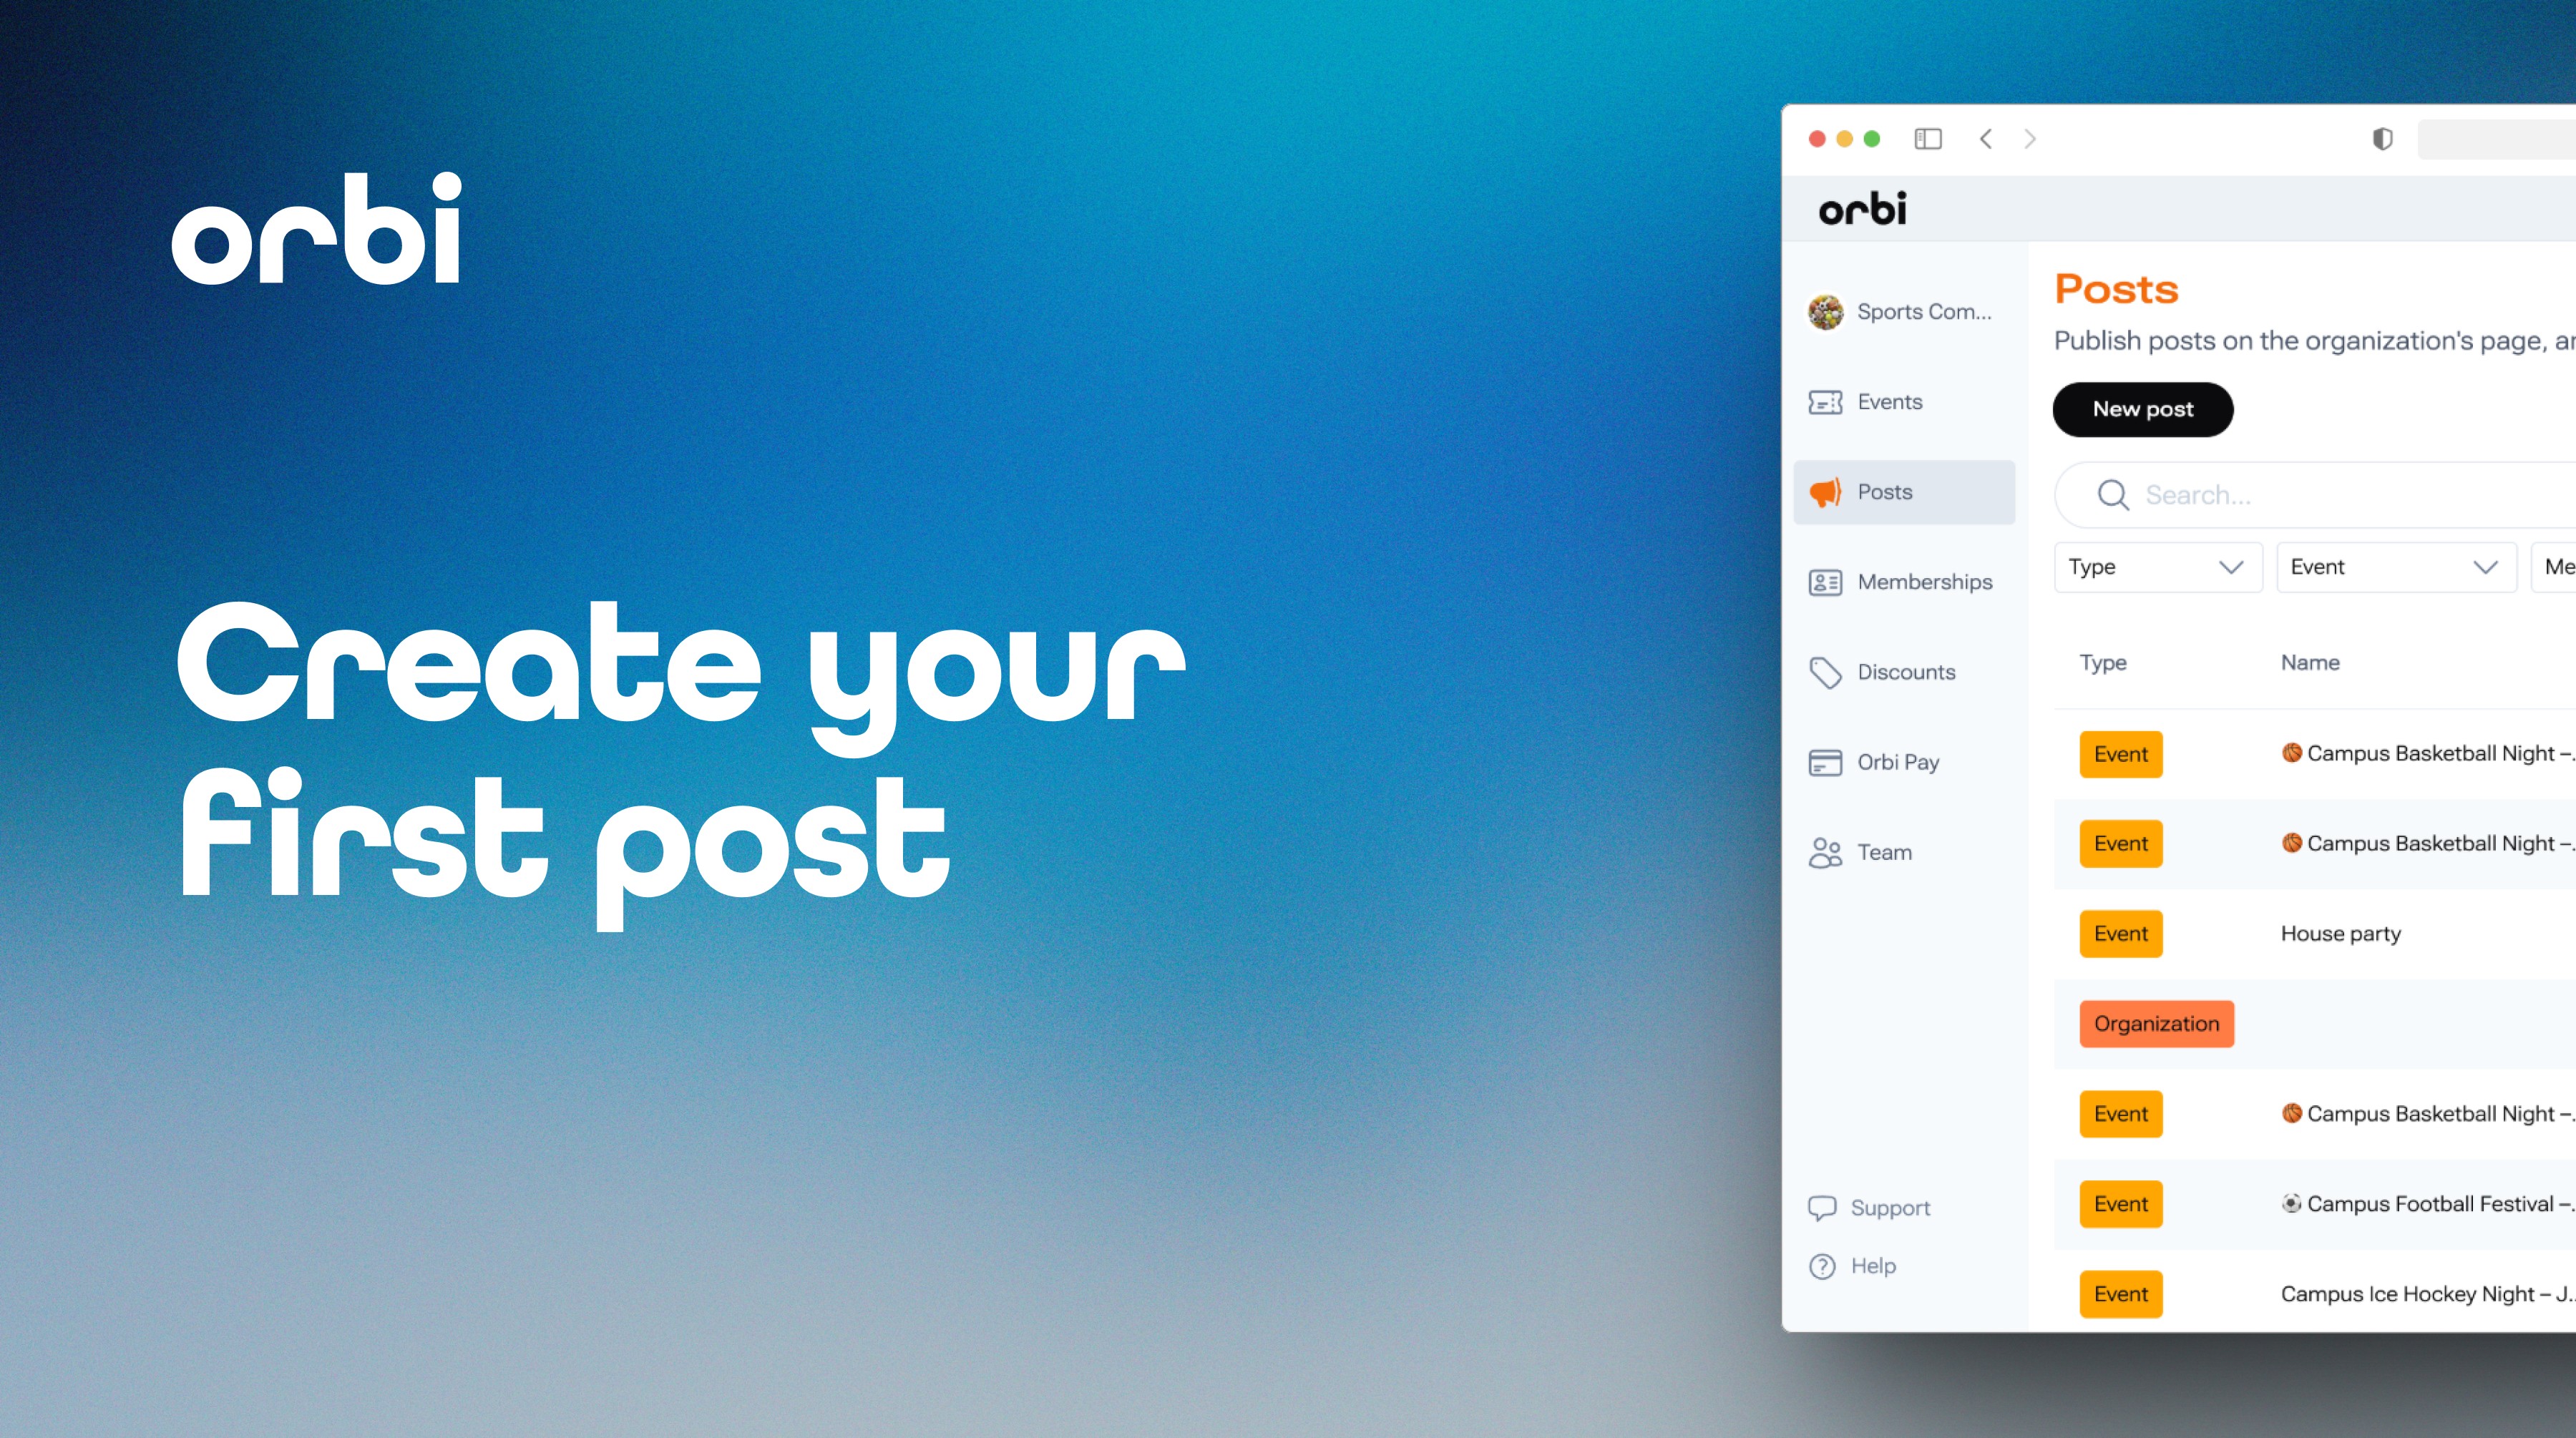
Create your first post
Learn how to create posts to engage your audience, share updates, and communicate with your members.
Read more ->